How to Fix Squeaky Wood Stairs for Good
Creak... groan... squeak. If that’s the soundtrack to your daily trips up and down the stairs, you’re not alone. Squeaky stairs are one of the most common—and annoying—household grievances. While they can add a certain spooky charm in October, the rest of the year, they’re just plain disruptive.
The good news is that you don't have to live with the noise. Most squeaky stairs are a simple DIY fix that you can tackle in an afternoon with just a few tools. That nagging creak is usually just a sign that parts of your staircase have loosened over time, and a little tightening is all it takes to restore peace and quiet.
In this guide, we'll walk you through everything you need to know to diagnose and fix your noisy staircase, just like an expert would over the phone. Let's silence those squeaks for good.

Why Do Stairs Squeak in the First Place?
Before we grab our tools, it helps to understand what’s causing the racket. A staircase is a complex structure made of several wooden components:
- Treads: The flat part you step on.
- Risers: The vertical boards between the treads.
- Stringers: The long, diagonal support boards that hold the treads and risers in place.
Your stairs are constantly under pressure from foot traffic, temperature changes, and shifts in humidity. Over time, this causes the wood to expand and contract. As it does, the nails and screws holding everything together can loosen, creating small gaps. That squeaking sound you hear is simply the sound of wood rubbing against wood or a loose nail.
While it's usually not a sign of a major structural problem, it's a nuisance worth fixing.
Step 1: Become a Squeak Detective and Locate the Noise
Your first mission is to pinpoint exactly where the squeak is coming from. A single step can have multiple noisy spots, so being precise now will save you time later.
- Walk the Stairs Slowly: Go up and down the staircase one step at a time. Put pressure on different parts of each tread—the front, the back, the left, and the right.
- Confirm the Spot: When you hear a squeak, step on that exact spot a few times to confirm you've found the culprit.
- Mark It: Use a small piece of painter's tape to mark each and every squeaky location. This creates a visual map of your problem areas.
Once you have all the noisy spots marked, you can move on to the diagnosis. The next big question will determine your entire approach: can you get underneath the staircase?
Step 2: Choose Your Method – From Below or From Above?
Accessing the underside of your staircase (from a basement or crawlspace) is the gold standard for a clean, invisible repair. If you can’t get underneath, don’t worry—there are effective methods for fixing squeaks from the top, too.
Method 1: The Underside Approach (If You Have Access)
This is the preferred method because all your repairs will be hidden from view. You'll need a helper for this part, so grab a family member or friend.
Marking the Squeak from Below
- Position Your Helper: Have your helper stand on the first marked tread from Step 1. Ask them to rock back and forth to make the stair squeak on command.
- Get Underneath and Observe: While they make the stair squeak, get under the staircase with a flashlight. Look closely at where the squeaky tread meets the stringer. You should be able to see a small amount of movement causing the friction.
- Circle the Spot: Once you see the movement, use a pencil to circle the problem area on the underside of the tread and stringer. Repeat this for every marked squeak.
Tightening or Replacing Existing Screws
Often, the original fasteners have simply come loose.
- Safety First: Put on your safety glasses before working overhead.
- Check for Screws: Look for any existing screws securing the tread to the stringer in your circled areas.
- Tighten Them Up: Use a drill to tighten any loose screws you find. You may need your helper to stand on the step to press the tread firmly against the stringer while you do this.
- Replace Stripped Screws: If a screw just spins without tightening, it's "stripped." Remove it and replace it with a slightly longer and thicker 2-½ inch wood screw to get a fresh grip.
After tightening or replacing, have your helper step on the stair again. Is the squeak gone? If so, you're a hero! If not, it's time to add some new support.
Adding New Screws for Reinforcement
If there were no screws or tightening them didn't work, adding new ones will almost certainly solve the problem.
- Press the Tread Down: Have your helper stand firmly on the squeaky spot to close any gap between the tread and the stringer.
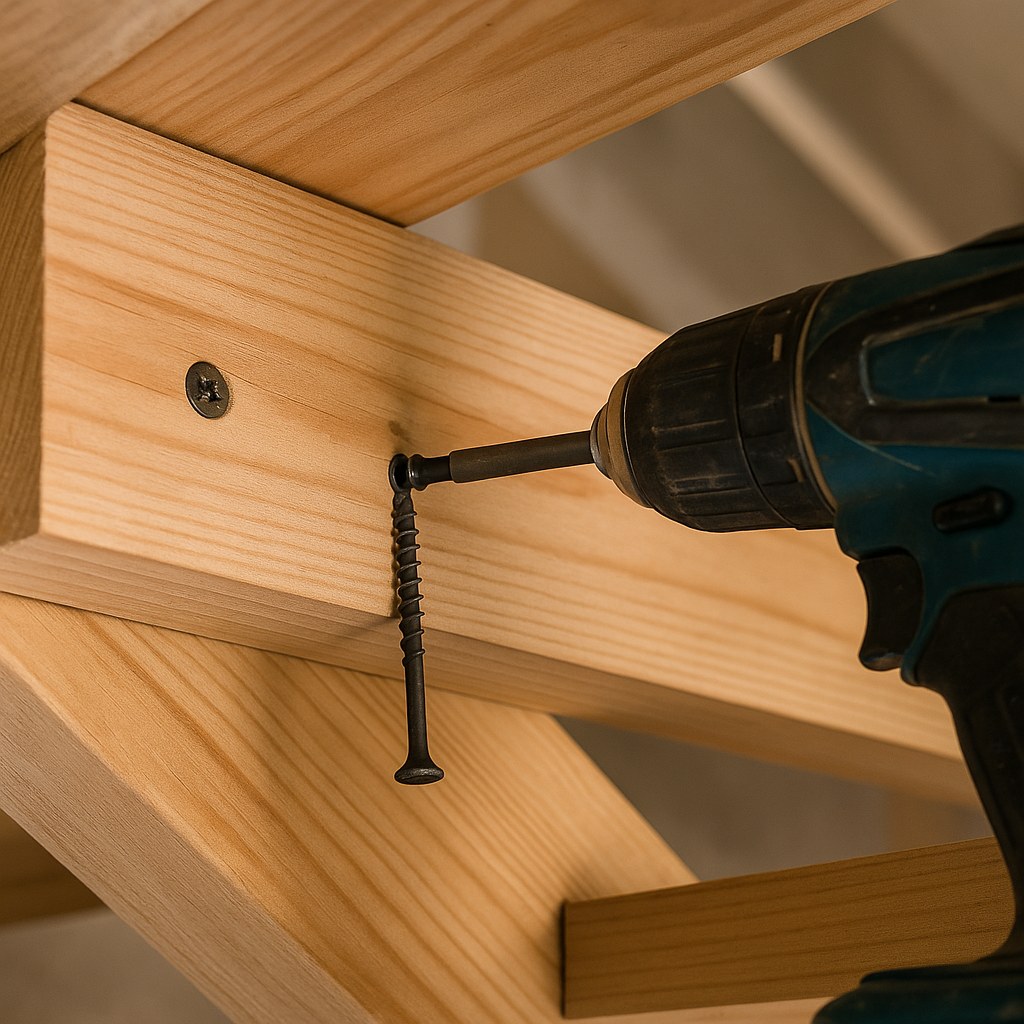
- Pre-Drill a Hole: Using a 1/8-inch drill bit, drill a pilot hole up through the stringer and into the bottom of the tread at your circled spot. Pre-drilling prevents the wood from splitting.
- Drive the Screw: Drive a 2-½ inch wood screw through the pilot hole until the head is snug and flush against the stringer. Be careful not to overdrive it.
- Test It Out: Have your helper walk on the step. The squeak should be gone. If not, you can add another screw nearby for extra stability.
Method 2: The Top-Down Approach (No Underside Access)
If your staircase is enclosed, you'll have to work from above. The technique varies slightly depending on whether your stairs are carpeted or bare wood.
For Carpeted Stairs
Working through carpet requires a bit of finesse, but it's very effective. The goal is to secure the tread without leaving a visible trace.
- Find Your Mark: Locate the painter's tape you placed on the carpeted tread.
- Make a Small Incision: Use a sharp utility knife to make a tiny, ½-inch slit in the carpet right over the squeak. Be careful to only cut the carpet and backing, not the padding underneath.
- Expose the Wood: Gently part the carpet fibers to see the wood tread below.
- Drill and Secure: Pre-drill a 1/8-inch pilot hole through the tread and into the stringer below. Then, drive a 2-½ inch wood screw into the hole until its head is just slightly below the surface of the wood.
- Conceal Your Work: Use your fingers or a screwdriver to brush the carpet fibers back over the screw head, hiding the slit. The repair will be virtually invisible.
Test the step. The squeak should now be gone.
For Bare Wood Stairs
Fixing a squeak on a hardwood staircase requires a neat finish.
- Locate the Squeak: Find your painter's tape on the bare wood tread.
- Drill at an Angle: Pre-drill a 1/8-inch pilot hole at a 45-degree angle through the tread and into the stringer. Angling the screw gives it more holding power.
- Countersink the Screw: Drive a 2-½ inch wood screw into the hole until the head sits about 1/16-inch below the wood surface. This small recess is called a countersink.
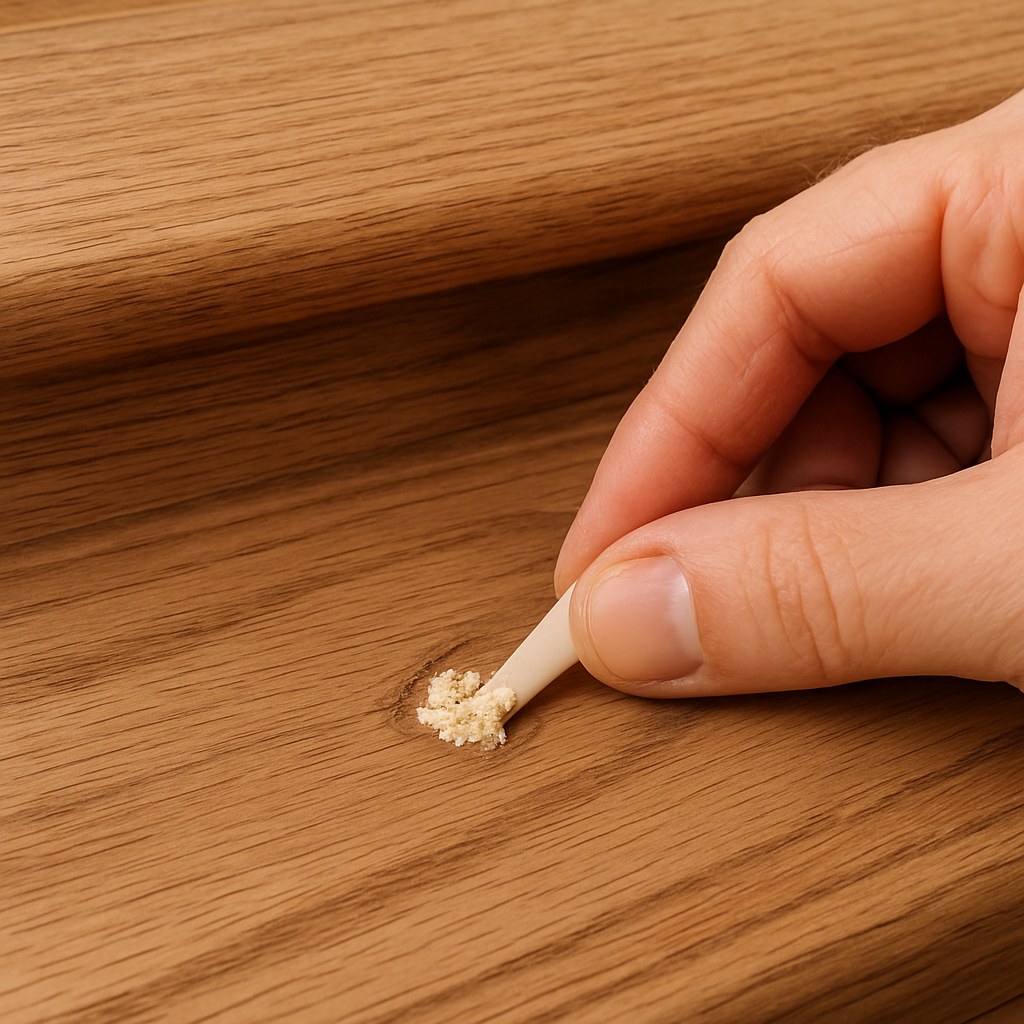
- Fill the Hole: Take a small amount of wood filler that matches the color of your stairs and press it into the hole, covering the screw head.
- Wipe and Wait: Use a damp cloth to wipe away any excess filler from the tread's surface. Let it set for about five minutes (or as directed by the product instructions). Once dry, the repair will be barely noticeable.
How Much Does It Cost to Fix a Squeaky Staircase?
One of the best parts about this project is how budget-friendly it is.
- DIY Cost: If you tackle this yourself, you’re likely looking at a cost of under $20. All you need is a box of wood screws and maybe some wood filler.
- Professional Cost: If the job feels too big or if these fixes don't work, hiring a carpenter is your next step. According to Thumbtack, a professional stair repair can range from $150 to $500, depending on the extent of the problem and your location.
Doing it yourself can clearly save you a significant amount of money.
What If the Squeak Is Still There?
If you’ve tried these methods and the ghost in your staircase persists, it could be a sign of a more complex issue. The squeak might be coming from the riser, or there could be a deeper problem with the stringer itself. At this point, it’s best to call a professional carpenter or contractor. They have the tools and expertise to diagnose and fix more stubborn structural issues.
Take the Next Step with Casa
Fixing a squeaky staircase is a satisfying project that makes your home a more peaceful place. With a little detective work and the right technique, you can silence those steps and walk with confidence.
Feeling empowered? There's a whole world of home maintenance waiting for you. For more easy-to-follow DIY guides, expert tips, and a simple way to connect with trusted pros for the jobs you can't handle, download the Casa app today. We're here to help you manage and maintain your home, one successful project at a time.

